Table of Contents
Introduction
Overview of Composting
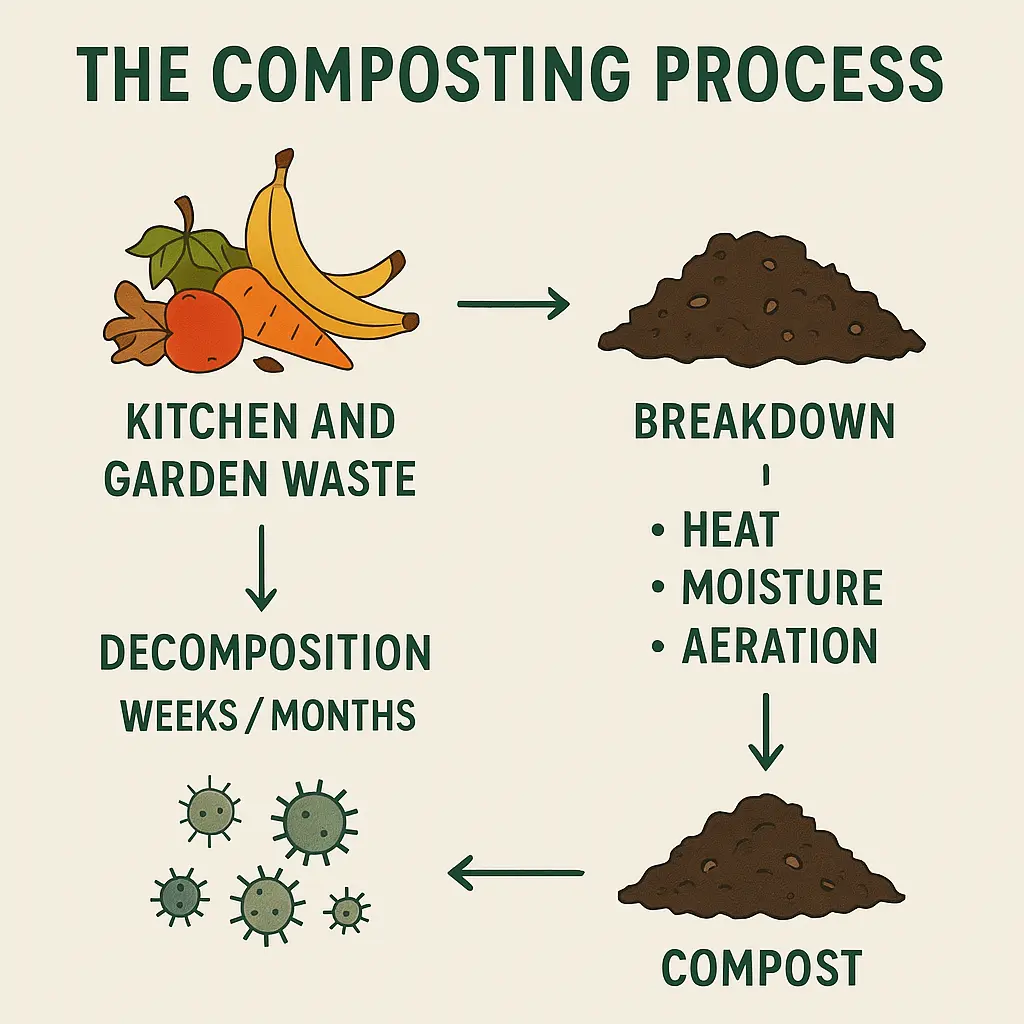
Composting is a simple, natural process that transforms organic waste into a nutrient-packed soil amendment. Every time you toss fruit peels, vegetable scraps, or even autumn leaves into a compost pile, you’re encouraging beneficial microorganisms to break these materials down into rich, crumbly compost. This finished product not only nurtures healthier plants but also helps cut down on overall household waste. Whether you’re a beginner who’s just getting acquainted with the concept or a seasoned gardener in search of fresh perspectives, a solid understanding of composting lays the groundwork for a flourishing, eco-friendly garden.
Why Composting Matters
Environmental Benefits
Starting a compost isn’t just about finding a new use for kitchen scraps—it’s also a step toward preserving our planet. Every peel, eggshell, or coffee ground that goes into composting at home reduces the amount of waste heading to landfills. In fact, according to the U.S. Environmental Protection Agency (EPA), food scraps and yard trimmings make up nearly 30% of what we throw away. When organic materials decompose in landfills, they release methane, a potent greenhouse gas (U.S. EPA, 2021). By contrast, backyard compost encourages aerobic decomposition, which produces fewer harmful emissions. It’s one of the most accessible ways to lower your household’s carbon footprint. Plus, when you embrace the basics of composting on a local scale—whether in a large yard or a small bin—you’re actively participating in a global effort to lessen environmental impact.
| Statistic | Data / Explanation |
|---|---|
| Organic materials in landfills | Up to 30% of landfill waste consists of food scraps and yard trimmings that could otherwise be composted. |
| Methane vs. CO2 (global warming potential) | Methane is 25–28 times more powerful than carbon dioxide at trapping heat in the atmosphere over a 100-year time horizon. |
Soil Health Benefits
Healthy soil is the foundation of any thriving garden. One of the most common questions people ask is, “How do you start a compost that truly enriches the ground?” The key is understanding that successful composting depends on balancing materials to nourish beneficial microorganisms. These organisms break down waste into nutrient-dense humus, boosting the vitality of your plants. Incorporating finished compost into your beds or pots improves soil structure, enabling roots to take up water and nutrients more effectively. Over time, consistently adding backyard compost can reduce the need for synthetic fertilizers and help protect local ecosystems.
Essential Components of Compost
Green Materials (Nitrogen-Rich)
Green materials are the lifeblood of any composting how-to guide. These items include kitchen scraps like fruit peels, vegetable trimmings, coffee grounds, and fresh grass clippings or plant cuttings. Nitrogen-rich ingredients break down quickly, fueling the microbial activity that helps transform waste into nutrient-dense compost. When people ask, “How do you start a compost that won’t smell?” the answer often begins with choosing the right greens balance. Too many can result in odors, while too few slow the entire decomposition process.
Brown Materials (Carbon-Rich)
On the flip side, brown materials bring the necessary carbon to your compost pile. Think dry leaves, straw, shredded newspaper, or untreated wood chips. This organic matter keeps your heap from turning into a slimy mess by soaking up excess moisture. A good rule of thumb is to add roughly two or three times as many browns as greens when starting a compost in your backyard. This ratio helps maintain the ideal carbon-to-nitrogen balance for smooth, odor-free breakdown.
Oxygen & Moisture
Even if you’ve mastered the basics of composting, overlooking oxygen and water can derail the process. Aerobic microbes need airflow to thrive, which is why regular turning or mixing is essential—especially in backyard compost setups. Meanwhile, keeping everything as damp as a wrung-out sponge ensures steady decomposition without drowning beneficial organisms. If your compost gets too wet, you may notice a foul odor and sluggish breakdown. If it’s too dry, materials will decompose at a snail’s pace. Striking the right balance of air and moisture is the key to composting at home without hassle.
Step-by-Step Composting Process
Choosing the Right Composting Method
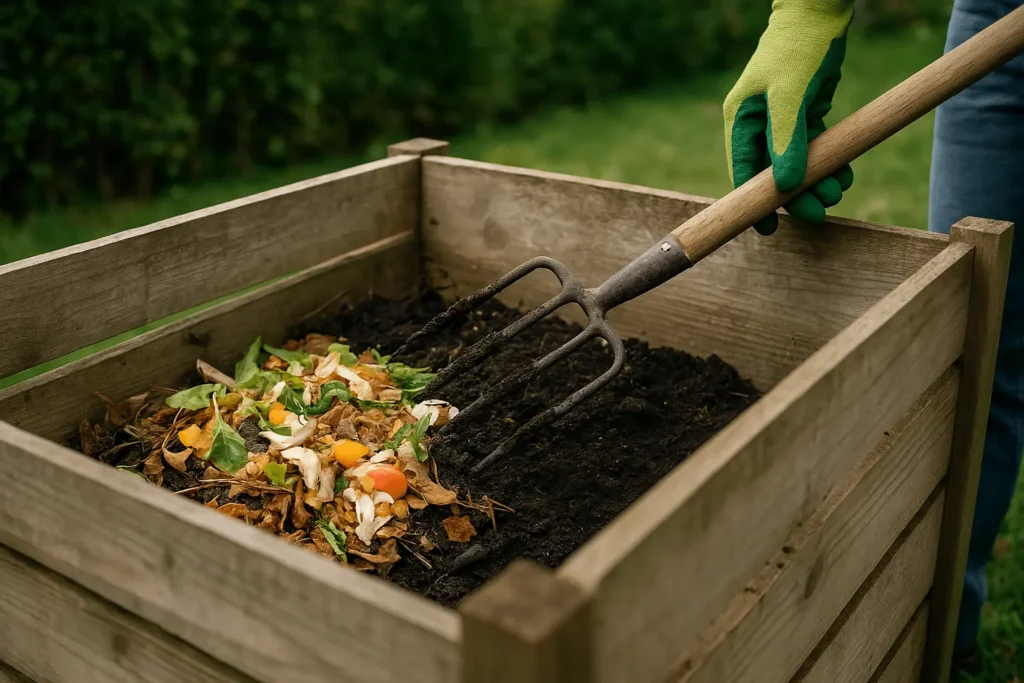
Before you dive into the process of composting at home, it’s crucial to pick a system that fits both your lifestyle and your available space. Here are some popular options:
- Backyard Compost Bin or Pile
Ideal if you have a sizable yard. You can build or buy a bin, layer your organic materials, and let nature do the work over time. - Compost Tumbler
Perfect if you’re short on time or want a quicker method. Turning the pile is effortless, which speeds up decomposition. - Worm Bin (Vermicomposting)
A great solution for those with limited outdoor space—or anyone who wants to compost indoors year-round. Worms break down food scraps efficiently in a small, contained bin.
Tip: Consider how much food waste your household produces and how frequently you’re willing to turn or aerate the compost. By choosing a method that aligns with your needs, you’ll be well on your way to mastering the basics of composting.
Building the Pile (Layering)
Once you’ve chosen a method, the next question might be, “How do you start a compost pile that won’t cause headaches down the road?” Begin with a base layer of coarse browns, such as twigs or dry leaves. This layer promotes drainage and airflow right from the bottom. Next, add your green materials—fruit peels, veggie scraps, fresh grass clippings—followed by another layer of browns. Keep repeating this pattern until your bin or pile is full. Remember, starting a compost successfully often comes down to maintaining a healthy ratio: roughly two or three parts carbon-rich browns to every one part nitrogen-rich greens. This layered approach helps regulate moisture and temperature, ensuring a steady breakdown of materials.
Maintaining & Turning the Compost
The next step in any “composting how to” guide is proper maintenance. Once your pile has a balanced ratio of greens and browns, it’s crucial to introduce oxygen by turning it regularly. If you have a traditional backyard compost pile, use a pitchfork or shovel to mix the layers every week or two. For tumbler systems, simply rotate the barrel as recommended—often just a few spins every couple of days. Keep an eye on moisture levels; aim for a texture similar to a wrung-out sponge. If the pile seems too dry, add a bit of water or more green materials. If it’s soggy or emits unpleasant odors, mix in additional browns like shredded newspaper or straw. This consistent care ensures beneficial microbes stay active, transforming waste into a garden-boosting powerhouse.
When & How to Harvest Finished Compost
One of the most satisfying parts of composting at home is harvesting the dark, crumbly product that indicates your efforts have paid off. The time frame varies—some piles may be ready in as little as two to three months, while others need closer to six months or more. You’ll know your compost is finished when it’s no longer recognizable as kitchen scraps or yard debris and has an earthy, fresh smell. Use a garden fork or screen to separate any partially decomposed bits from the fully aged compost. The latter can be mixed into your planting beds, sprinkled around the base of established plants, or even blended into potting mix for houseplants. Harvesting at the right moment gives your garden a nutrient boost and clears space for new compost layers to begin the cycle again.
Common Mistakes (and How to Avoid Them)
Improper Ratios
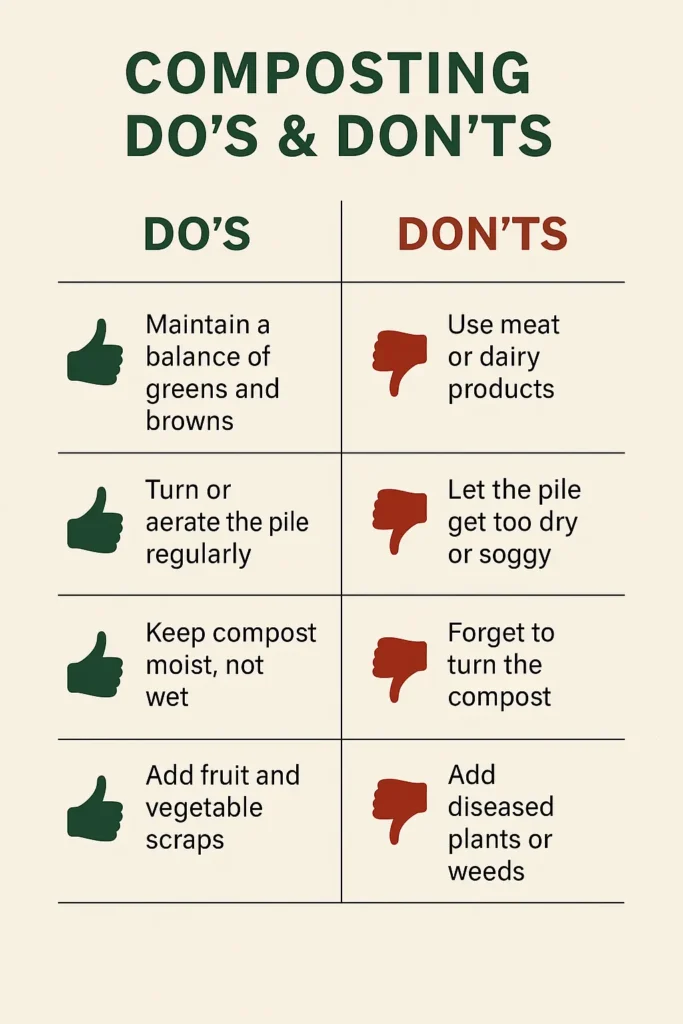
Even if you’ve mastered the basics of composting, using too many green materials without enough browns can lead to a slimy, foul-smelling heap. When starting a compost, remember that your carbon-to-nitrogen ratio should favor browns about two or three times more than greens. If you notice strong odors, mix in extra dry leaves, newspaper shreds, or other carbon-rich items to balance things out. Conversely, a pile overloaded with browns might break down at a snail’s pace, so consider adding more green materials (like kitchen scraps) if your compost isn’t heating up.
Overwatering or Underwatering
Water plays a pivotal role in composting at home, but it’s easy to make mistakes. Too much moisture creates an anaerobic environment where beneficial microbes can’t do their job, leading to unpleasant smells. If your backyard compost is soaking wet, add a layer of dry browns—such as straw or shredded cardboard—to absorb excess water. On the flip side, a pile that’s too dry slows decomposition because the microbes don’t have the damp conditions they need to thrive. In that case, lightly sprinkle water or incorporate more fresh greens to achieve a consistency similar to a wrung-out sponge.
Neglecting to Turn or Aerate
A common query in any composting how to guide is how often to mix the pile. “How do you start a compost that actually works?” Often, the answer is regular turning or tumbling. Without proper aeration, your compost may go anaerobic and emit a sour odor. Stirring the materials every week or two infuses oxygen and helps maintain even decomposition. If you’re using a tumbler, rotate it as recommended—usually a few spins every couple of days—to keep everything well-aerated. Frequent turning also redistributes moisture, preventing soggy pockets or dry corners from halting progress.
Adding the Wrong Materials
When you’re eager to reduce waste, it can be tempting to toss in anything organic. However, certain items spell trouble for backyard compost. Avoid meat, dairy, or greasy leftovers, as they can attract pests and lead to foul odors. Similarly, it’s best to leave out diseased plant materials or weeds loaded with seeds—unless your pile reliably reaches high temperatures to neutralize them. Sticking to safe, plant-based scraps, paper products, and untreated yard waste will ensure your compost matures into a clean, high-quality soil enhancer.
Frequently Asked Questions (FAQs)
1. Can I compost if I live in an apartment?
Absolutely. If you don’t have outdoor space for a backyard compost pile, you can try vermicomposting (worm composting) or use a compact tumblers designed for balconies and patios. Both methods allow you to start composting at home without requiring a large yard.
2. How long does it take for compost to be ready?
The timeline varies depending on factors like temperature, moisture, and how often you turn your compost. In general, a well-maintained backyard compost pile can produce finished compost in about 2–6 months. Some slower, less-managed piles may take up to a year or more.
3. What should I avoid putting in my compost?
Steer clear of meat, dairy, oily foods, and diseased plant material. These items can attract pests, cause foul odors, or introduce pathogens. Most basics of composting guides also recommend skipping weeds with seeds, unless you’re sure your pile reaches high enough temperatures to neutralize them.
4. Do I need a special container to start a compost?
Not necessarily. You can use a simple compost bin, a large plastic tote with ventilation holes, or even just a designated spot in your yard. The important thing is to manage the green-to-brown ratio and keep your compost aerated. If you’re wondering “how do you start a compost” without any specialized gear, a simple open-air pile will do, as long as you turn it regularly and monitor moisture levels.
5. Why does my compost smell bad?
Unpleasant odors typically arise from poor aeration or an imbalance in the materials you’re using. If your pile smells rotten, try adding more brown materials (like dry leaves or shredded newspaper) and turning it more frequently. This helps introduce oxygen, which is crucial for composting at home without the stink.
6. Can I compost in the winter?
Yes! Even in colder climates, you can continue composting how to strategies by insulating your pile with straw or leaves. Decomposition will slow, but the process doesn’t stop entirely. If winter temperatures dip extremely low, consider vermicomposting indoors so you can keep breaking down scraps all year long.
Conclusion
Key Takeaways
Composting may seem like a daunting endeavor at first, but by following these basics of composting, you’ll soon discover just how simple and rewarding it can be. From balancing green and brown materials to monitoring moisture levels, each step brings you closer to a sustainable, nutrient-rich soil amendment. Whether you’re starting a compost in a small bin or maintaining a backyard compost heap, keeping the right ratios, turning the pile regularly, and avoiding the wrong materials can make all the difference.
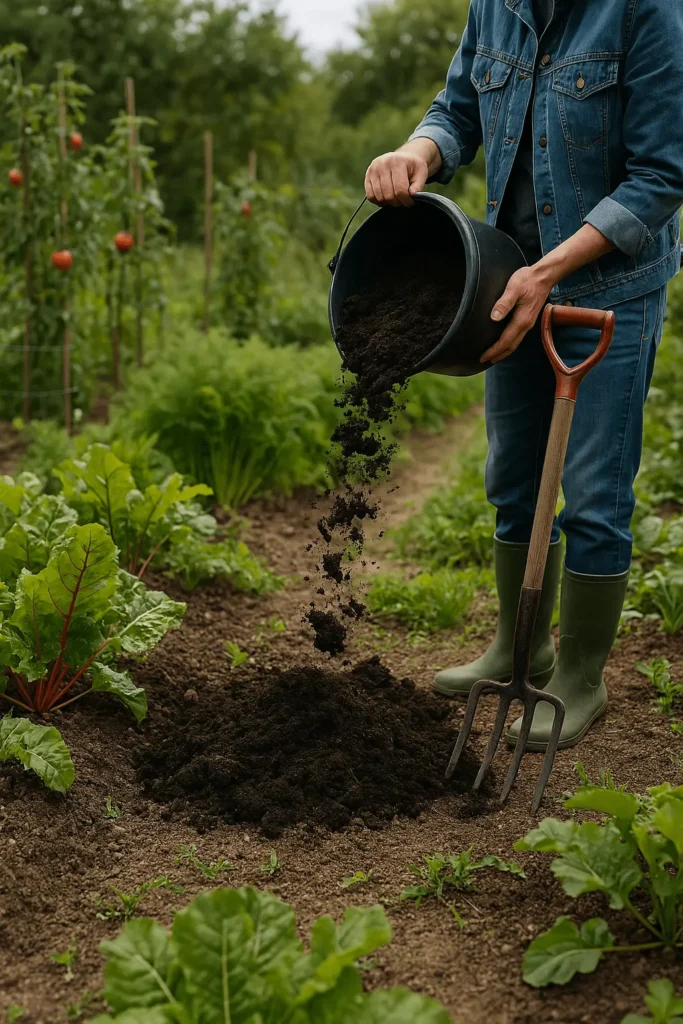
If you’ve ever asked yourself, “How do you start a compost that genuinely works?” remember that patience, consistency, and a bit of trial and error are all part of the journey. Over time, composting at home not only cuts back on food waste and greenhouse gas emissions but also revitalizes your garden’s soil. Each batch of finished compost becomes a living testament to nature’s cyclical process—transforming everyday scraps into an invaluable resource for your plants, your yard, and the environment at large.
Ready to Get Started?
Take a moment today to set aside a small container in your kitchen for collecting fruit peels, coffee grounds, and vegetable scraps. Or, if you prefer to begin outdoors, gather some leaves and leftover produce to build the first layer of your compost pile this weekend. By taking these simple, immediate actions, you’ll jump-start your composting journey—and every scrap you add brings you closer to reducing waste and nourishing your garden with rich, homemade compost.
Turning compost into garden gold — one scoop at a time!
